Ingredients
For the starter:
- 1 cup of bread flour + 1/2 cup of water, replenished per instructions
- Container (glass, pyrex, plastic or ceramic), about the size of a 4-cup measure
For the bread:
- 1/3 – 1/2 cup of starter
- 1 1/2 cups water
- 3 cups bread flour
- 1 cup stone ground whole wheat bread flour
- 1 teaspoon of salt
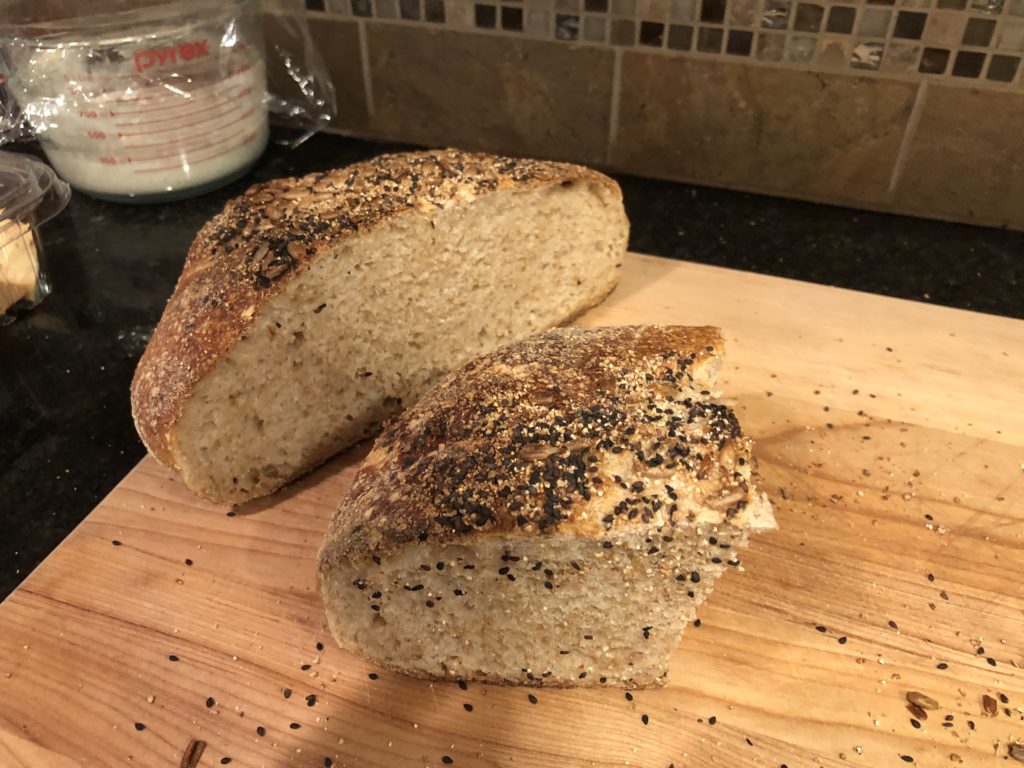
- optional: 1 Tablespoon seeds (sesame, poppy seed, caraway, cumin, cardamom) pumpkin, sunflower, etc.)
- utensils: large bowl, small bowl, fork, whisk, spatula 2 clean dish towels, sheet of parchment paper, and a dutch oven or covered pot able to withstand a 500 degree oven.
Preparation
First, make the starter – or receive from a friend.
Find a simple recipe online for 6 day sour dough starter, for more detail.
Basically, mix the flour and water, cover loosely and place on your kitchen counter to let the mixture bubble and rise (ferment) for a day or two. “Discard” all but about 1/2 cup and “feed” with another cup of flour and 1/2 cup of water, mixing well. For the next 4-6 days, repeat the discard and feed routine twice a day, at about the same time, noticing that the starter will rise and fall. Feed when the starter is “hungry,” or has shrunk in volume. After about a week, you can store the starter in your fridge and discard/feed once a week. You can even freeze it if you wish to take a break from bread-making.
Remove the starter from the fridge the day before you make bread, and discard/feed it one more time about 4-8 or so hours before you plan to make bread. Getting the starter to room temperature will make it easier to mix.
For the bread.
In a large bowl, whisk water and starter together. Add flour and salt and mix together with a fork until combined in a shaggy dough. Cover with a damp towel and let rest for about 1/2-1 hour . Next, pull and stretch the dough, folding it over and pressing with your fingers or hands, going in a circle, until the dough starts to firm up. Cup with your hands to form a nice round shape or boule. Cover, and if you have time, repeat again in about an hour. Let rise overnight, or for about 10-12 hours, covered with the damp cloth. The dough should double in bulk.
Next, do two more stretch/folds, letting the dough rest covered with the damp cloth in between. After the final stretch, place in a smaller bowl lined with a dish towel. (lay one side of the dish towel over the bowl, sprinkle with seeds and a bit of whole wheat flour and lay the bread smooth side down). Cover the dough with the towel and let rise for 1/2 hours (or for several hours in the fridge).
Meanwhile, preheat the oven to 500, preferably a convection oven.
Transfer the dough onto a piece of parchment and into the pot. With a serrated knife, cut decorative slices across the dough from one end to another to permit steam to escape and the bread to rise. Cover and bake for 20 minutes, then remove the cover and continue to bake for 20-25 additional minutes until golden brown and fully baked (inside temp about 210F). Let cool for about an hour before you try the bread.
Don’t discard your “discard!” There are plenty of recipes on the internet for “discard” pancakes, waffles, scones, muffins and quick breads, pie crusts, cookies and crackers. Stick it in the freezer if you can’t use it right away, or offer it to a friend or neighbor.
What makes it special?
Bread shortage and time on our hands in the early days of the pandemic inspired me to do something I haven’t done for a long time: bake bread. Seems like I wasn’t the only one, as there was a serious flour shortage for awhile, so I had to experiment with different kinds of flour (note that all purpose flour is very different from bread flour and needs some recipe adjustments). This recipe seems to work for me though, and is very forgiving of inexact quantities. It also gets better as the starter matures and the baker gets a feel for bread making. I also like the way it is so easy to do while giving a little bit of structure to your days. Great project for kids and a nice stress-reliever.
Recipe shared by anonymous


